
Moving Out 2 has finally launched (and it’s included with PlayStation Plus Extra!), and once again it’s an absolute treat for anyone looking to perfectly and realistically simulate the act of moving a bunch of junk from one building to another, complete with heated and potentially violent arguments amongst family, friends and paid contractors.
If you’re getting stuck into SMG Studio’s fantastic sequel, you might also want to know how to score the ultimate bragging rights and unlock every single trophy (or achievement) on offer. There are more than a few of ’em! Luckily for you, I’ve dug the ol’ typing fingers out of storage and slapped together a handy guide to anything you could want or need to know about every trophy/achievement in the game and how to unlock them.
Get around it:
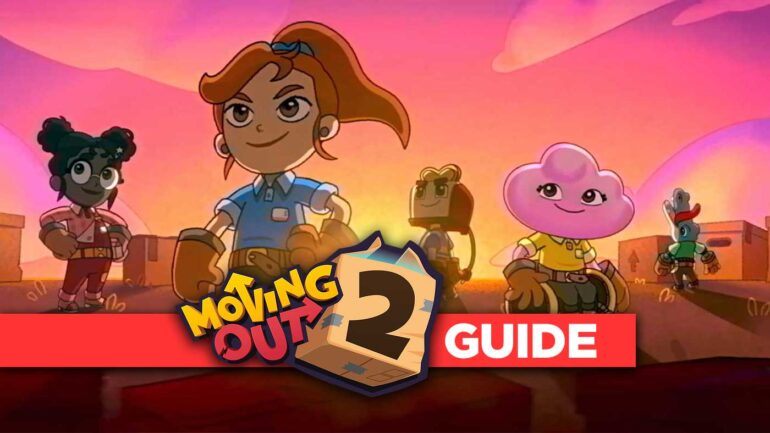
Moving Out 2 Trophy Guide And Collectibles
Gone Platty
Do everything we asked for and more! (Platinum)
See below (and below, and below, and below, and below, and below, and…)
Open The Portals
Pass your first day at Smooth Moves (Bronze)
You’ll get this as part of playing through the opening portions of the game. If this trophy doesn’t pop for you, it might be due to an error where you’ve booted up the game and then changed your mind and commandeered a small ocean vessel to sail off into the horizon with nothing but the clothes on your back and the clothes on your front. Otherwise, this should work as intended.
This is not a dream!
Complete the Fantasy Dimension (Silver)
Aside from the starting world of Packmore, this game is split up into a number of other dimensions, each with their own selections of stages and four Tech Gnomes to rescue. You’ll get a trophy for finishing each one, and this is one of those trophies.
I want Candy!
Complete the Candy Dimension (Silver)
See the above, it should still make sense here.
Welcome to the Future!
Complete the Future Dimension (Silver)
See above, or above the above. Whichever works for you. I’m not fussy. What do you want for dinner?
Call All Tech Gnomes
Find all the Tech Gnomes (Silver)
These little tech support friends are the main goal of Moving Out 2’s campaign, you won’t be able to see it through to the finale until you’ve rescued all of them. Like so many other trophies in this list, this trophy should be a given, provided you’re not a quitter. If you’re a quitter, that’s still perfectly fine and valid, you just won’t get the short-lived dopamine hit associated with popping trophies like this one. I can’t imagine living like that, but to each their own.
A Job Well Done
Complete all the levels (Gold)
Do the levels. All of them. There’s like, 50-something I reckon. I didn’t do an official count, so I’m sorry if it turns out there’s actually 20 levels or 700 levels, but those numbers definitely don’t seem right. 50 levels seems more right. Just keep doing levels until you run out of levels and if this trophy doesn’t pop then there’s more levels.
I’m Moving In!
Complete a Moving In level (Bronze)
The Moving In levels are some of my favourites. Rather than have you invade attend an unsuspecting person’s a customer’s home and take all of their stuff move their belongings into your truck, you’re tasked with doing the opposite and delivering your truckload of items into their specifically-requested locations within the stage. You’ll definitely do at least one while you’re playing the campaign, so this trophy ain’t difficult.
Score Attack!
Complete a Score Attack level (Bronze)
The Score Attack levels give you a break from Moving Out or Moving In with minigame-esque challenges that ask you to do things like catch falling candies or lob big balls into hoops with giant slingshots. These are also fun, and likewise will pop up while you’re working your way through the campaign, so don’t sweat this one too much. Don’t sweat at all, if you can help it.
1st F.A.R.T
Reach F.A.R.T level 1 (Bronze)
You’ll gain F.A.R.T. ranks by earning stars in levels, through completing them in pass time, making it in “PRO” time or completing any of the number of optional objectives per level. You’ll reach most of the F.A.R.T. ranks simply by playing through and completing the campaign. F.A.R.T. level 1 is unremarkable and unavoidable, like the little silent toots that slip out when I walk down flights of stairs.
F.A.R.T to the power of 3
Reach F.A.R.T level 3 (Silver)
As above, you should be reaching these early F.A.R.T. levels naturally by playing through the campaign jobs. F.A.R.T. level 3 shows effort, but little follow-through. Which may or may not be a good thing, depending on your angle.
I see F.A.R.T movers
Reach F.A.R.T level 6 (Silver)
F.A.R.T. level 6 is approaching the big leagues. People will start to take notice of your F.A.R.T. rank now, so don’t be surprised if you start getting looks on public transport. You’ll need to think about hitting those PRO times and optional objectives to get to the upper echelons of F.A.R.T.
Max F.A.R.T
Achieve max F.A.R.T rating (Gold)
This is it. You’ve done it. By smashing all of those PRO times on jobs and satisfying the optional objectives in a veritable buttload of stages, you’re now Top F.A.R.T. Not to gas you up too much, but you’ve now achieved the kind of F.A.R.T. status that clears the room when you walk in. You deserve the Brown-down-low Medal.
Totally Optional
Completed all optional objectives on a level (Bronze)
Each level in Moving Out 2 has a total of five objectives to complete to earn stars towards your F.A.R.T. rating. All you need to do for this trophy is complete all of the optional ones in any level, which is easiest one any of the earlier levels but more fun as things get trickier and more cryptic. One time I wrote a guide on how to achieve every one of the optional challenges in the original Moving Out, and I thought I’d be able to do the same again here but I severely underestimated how much I wouldn’t want to do that – so you get a trophy guide instead.
I Cart Therefore I Am
Find an arcade cart (Bronze)
Arcade Carts in Moving Out 2 are very special because they unlock trophies. They also unlock new and challenging Arcade levels, I guess. But more importantly – trophies! If you’re here looking for help with achievements, I’m sorry I keep saying trophies. It’s the same thing, right? Everybody get along xoxo.
Cart Boss
Find all arcade carts (Gold)
Guess what? I’ve put in the work to guide you to each and every one of the Arcade Carts you’ll need to find in Moving Out 2. Isn’t that nice of me? I did screenshots and all. So high tech! Take a look:
Click/Tap To Expand
PACKMORE
- In the overworld map. At the top right end of the map hidden behind a small building. Unlocks Roll’s Moving Palace. Screenshot here.
- Catch Shack. At the bottom left of the stage on a boat, it’s one of the items you need for the move anyway. Unlocks Twists of Fury. Screenshot here.
MIDDLE FOLKMORE
- In the overworld map. From the world entrance go up and past the giant egg over the right hand bridge, follow this road up until you see a light blue portal, head in and grab the cart. Unlocks Spoutin’ About. Screenshot here.
SNACKMORE
- In the overworld map. From the world entrance head up the pink ramp on the right and down past the Sweet Tooth Slopes and Sugar Sorting Station levels. At the end of this path you’ll find your prize – provided you’ve achieved the legendary F.A.R.T. level 10!
THE VOID
- In the overworld map. From the world entrance head straight up and keep going until you get to the aqueduct, veer up and right and you’ll see it on a small floating island. Unlocks Recall Road. Screenshot here.
- Trained For This. This one is sitting on a beam directly to your right as soon as the level starts, but to get to it you’ll have to turn off the switches at every other one of these beams around the level, starting with the only one that’s not electrified, then continuing to each one until the electricity is gone from in front of this Arcade Cart. Unlocks Move Cubed. (Ever play Death Squared? It’s great!) Screenshot here.
- The Floor is Void. Right at the top corner of the level, in an out of bounds area. You can get here by sneaking through a bush in the far top right room, next to an arcade machine. Unlocks Whack to the Future. Screenshot here.
M.I.A
Find a missing employee (Bronze)
Moving Out 2 has a bunch of employees for you to choose from and virtually embody, but there are even more available than just the initial selection! Find special Character Crates hidden in levels and in the overworld maps and you’ll soon amass an army of colleagues big enough to make even the meanest CEO nervous.
Getting the Gang Back Together
Find all the crates (Gold)
Now you’ve gotta find all of your F.A.R.T. friends! There’s a heap of them, and they’re all great folks. So don’t leave them trapped, cruelly, in shipping crates. I’m a little concerned that the developers didn’t program enough fresh air and water for them to survive in there, so if you don’t seek them all out within the first few hours of starting the game I’m worried they’ll perish.
It’s a good thing I can tell you where they all are:
Click/Tap To Expand
PACKMORE
- In the overworld map. At the top end of the map next to a wooden bridge. Unlocks Henrietta. Screenshot here.
- In the overworld map. At the bottom right of the map on a wooden pier at the shore. Unlocks Tooki. Screenshot here.
- In the overworld map. This one’s a bit trickier, head down toward the bottom of the map and by a cliff you’ll see a bridge being held up by two ropes, drive into both ropes to lower it, then cross and navigate the little maze of islands until you reach this crate. Unlocks Herbie as well as the secret trophy Ahh That’s Why This Is So Long! Screenshot here.
- Chalet la Faye. On the right side of the level, upstairs, it’s part of the required items to pass. Unlocks Rye Yu. Screenshot here.
MIDDLE FOLKMORE
- In the overworld map. After entering the world go straight into the red portal in front of you, follow the road ahead and turn left but then keep going forward until you’re off the road, you’ll see a purple portal – go in that. Unlocks Bruce. Screenshot here.
- In the overworld map. After entering the world go straight into the red portal in front of you, follow the road straight ahead and veer off into the blue portal, drop down the cliff to the left and head under the aqueduct to the right. Unlocks Laika. Screenshot here.
- In the overworld map. From the world entrance go straight into the red portal, then immediately turn left and drive toward the wall, it’ll disappear and reveal this crate. Unlocks Cam. Screenshot here.
- Train To Train Transfer. This one’s pretty easy, as soon as you start you’ll see a red one-way door below you with the crate behind it, just hitch a ride on the train to the right and jump off to get the crate then carry it through the door and deliver it onto any of the trains. Unlocks Dazzlehoof. Screenshot here.
- Breezy Bazaar. This one’s also pretty easy to spot, just nestled next to the elevated room on the right side. Chuck it in the truck. Unlocks Old Blackwhiskers. Screenshot here.
SNACKMORE
- In the overworld map. From the world entrance head left to the honeycomb area and ride the spout up, then go left and up past the basketball arena and you’ll find this next to the big Jello Drops sign. Unlocks Sunny. Screenshot here.
- In the overworld map. From the world entrance head straight up and ride the spout, keep going straight past the spinning straw and you’ll see this next to the giant popcorn box. Unlocks Prof. Inkle. Screenshot here.
- Sugar Sorting Station. In the bottom left room underneath a stack of gummy bears, throw it into any of the sorting stations. Sorted! Unlocks Sprinkles. Screenshot here.
PACKTROPOLIS
- In the overworld map. From the level entrance head straight down and go as far to the bottom of the world as you can, follow this outer ring left past two fans and you’ll see the crate. Unlocks Coco. Screenshot here.
- In the overworld map. From the level entrance head up and left as far as you can, you’ll see this one next to a bridge/gate. Unlocks Gilly. Screenshot here.
- The Pool House. At the very top of the level, tucked away behind the big dial with the giant red button. Just gently step *through* the glass windows along the side and step all over the nice plants and bushes to get to it. Unlocks Super Movebot 5000. Screenshot here.
- Watt’s House. As soon as the level starts, go and grab the battery and take it to the inputs closest to where the truck is, but put it in backwards. You’ll cause a platform to rise over to the left side of the stage with the crate on it. Unlocks Ramone. Screenshot here.
- The Strato Tower. In the outside garden area at the back of the level, you’ll have to bust through the window and then you’ll find it tucked behind some clouds. Unlocks Dials. Screenshot here.
- The Twilight Drone. On the bottom-most island, behind and underneath some other crates. It’ll be easy enough to toss back to the truck if you’re playing with friends, but if you’re alone you might have to take a couple of crisp dips into the water below just to leap and throw it far enough. Unlocks Clawdius. Screenshot here.
- The Dronies. Hidden under some bushes right at the starting area, behind a letterbox. Unlocks T. Pott. Screenshot here.
It’s Fashion Darling
Find a style crate (Bronze)
Style crates are the little boxes hidden through the overworld maps and in some levels, and they give you new outfits for characters that are already unlocked from the beginning. My style crate at home is a laundry basket full of clothes that are either clean or not, and every day is a lucky dip.
Style for days!
Find all style crates (Gold)
Here’s an exhaustive (and exhausting) list of where to find each style crate in Moving Out 2:
Click/Tap To Expand
PACKMORE
- 742 Evergoose Terrace. Part of the required items to complete the level, so I’m not even going to tell you where it is. We’re real early-game here and I don’t want to pander or patronise. Screenshot here.
MIDDLE FOLKMORE
- In the overworld map. From the portal into this world, drive up and pass by the big egg, and over the left bridge, behind a tree next to a portal is this style crate. Screenshot here.
- Sir Pent’s Library. From the centre of the level, head up and to the right and you’ll see a big stained glass doorway, tucked behind this is the style crate, deliver it and finish the level for your prize. Screenshot here.
- Gassy Grove. This one’s not really hidden as such, it’s chilling at the very topmost room next to one of the items you already need to deliver. Screenshot here.
SNACKMORE
- In the overworld map. From the level entrance take the lower left path, then the path straight down, and you’ll see it next to a block of chocolate. Screenshot here.
- Ginger’s Homestead. At the back next to the gingerbread shed, behind a tree which you’ll sadly have to smash. Screenshot here.
- Cake Cargo Chaos. Not even remotely hidden or tricky. It’s on the right hand platform down the bottom right. Fling it onto any conveyor belt to take it home like the sneaky package thief you are. Screenshot here.
- Chocolate Streams. At the back of the third platform is a door, above this door is the style crate. Slap the door to make the crate fall down. Side note: I hate this level. Screenshot here.
PACKTROPOLIS
- In the overworld map. From the level entrance head down and right until you’re at the Cloudy Labs level, then go up towards the orange bridge and you’ll find this tucked behind a sign. Screenshot here.
- Cloudy Labs. In the room at the back left with the blue floor, on a balcony covered in cloud along the left wall. Screenshot here.
- CHRG Labs. In the last room you’ll collect an object from, that takes three batteries to get to, right next to the object you’re collecting. If you somehow miss this I don’t know how to help you, it’s like you haven’t been paying any attention this whole time. Are you even listening to me?? Anyway yeah it’s there. Screenshot here.
- Stay Positive. This one actually took me ages to find because I was trying to big brain some kind of battery-based solution when all I had to do was listen to the logic that 30 years of gaming has taught me – there’s always a secret behind the waterfall. That’s true here, as well. Screenshot here.
THE VOID
- Palm Palace. In the room directly to the left of the turnstile, tucked away in the bottom left corner. Screenshot here.
Arcade Novice
Complete an arcade level (Bronze)
Remember when you went around and collected all of those hidden Arcade Carts for the other trophy? Well now you’ve gotta actually complete the damned things! Joke’s on you, collector person. Nah, these are actually a lot of fun and you’ll have fun completing them…
Arcade Legend
Complete 5 arcade levels (Silver)
…or else.
Wrecking Drone… Lisa needs braces!
Smash 256 statues total (Silver)
This can be done pretty quickly just be repeating the Indiana Drones level in Packtropolis a few times and smashing up all of the pillars. You don’t even need to finish it, just keep restarting once you’ve smashed everything and you’ll have this after about the third time. The best news is that even after you pop this trophy you can keep smashing stuff. Smash smash. SMASH. SMASH.
Hoops & Dreams
Make 25 shots on any of the basketball hoops in the game
The easiest way to get this early and quickly is to go to 742 Evergoose Terrace, grab the basketball from the upstairs bedroom and bring it to the hood of your truck, from which you can slam dunk into the nearby hoop like the NBA 2K23 you are.
Pain in the glass!
Break 95 windows (Silver)
You’ll absolutely have broken more than 95 windows by the time you clock out of your very last job and head home to a Woolies microwave butter chicken and the latest episode of Drag Race Australia. Also, if you got a chuckle out of the whole “95 windows” gag in this trophy you’re due for any number of check-ups right now. Don’t disappoint your GP, they’re very sensitive.
Gooooooooooalllllll!!!!
Score a goal in Packmore (Bronze)
There’s a soccer pitch toward the bottom of the Packmore overworld near the beach, and some silly kids have left their ball right in the middle of it. Drive your truck onto the pitch (watch out for silly kids) and punt that sucker in. If you somehow accidentally fling it outside the confines of time and space, or just somewhere not on the pitch, you can jump into a level and back out to reverse the flow of time and put everything back in its right place.
Ahh that’s why this is so long!
Find the Hidden Thing (Silver)
You’ll already get this while going for the character crates trophy but in the event that, for some reason, you want this specific trophy and not that one, here it is again. Head down toward the bottom of the Packmore overworld map and by a cliff edge you’ll see a bridge being held up by two ropes, drive into both ropes to lower it, then cross and navigate the little maze of islands until you reach the character crate, which unlocks Herbie. I’ve been trying not to think too much about the physics of those ropes holding the bring up in the air, because I don’t think that makes sense? Ugh, here I go again, thinking too much about it.
Smashing good time
Smash 404 items while driving the truck (Silver)
If you don’t pick this up naturally just by being a bad driver (good for you!), the easiest place to do this is just in Packmore. Just drive into a bunch of fences, light posts and mail boxes and when you run out of public and private property to smash, quickly load into a level and quit back out to see the fruits of upper-middle class insurance policies. Then smash more stuff.
Don’t Get Off The Train
Do you have the patience? (Bronze)
In the very final level of the game, The End Zone, right at the end (of The End Zone) you’ll board a magical train pulled by a giant goldfish. You’re meant to disembark when it reaches its destination, but if you stay on board you’ll wind up in a looping situation. If you have the fortitude to wait for around 10 minutes you’ll be rewarded with some amusing conversations, a few little visual surprises along the way, and of course your bronze trophy. Which feels a little like an insult but also I’m the one that sat here and watched a train loop 20-something times. Alternatively, you could go do something else while you wait, but then you’d miss published evidence of the folks at SMG Studio losing their absolute noodles.
So, how’d you go? I spent ages putting this all together, so if you notice any errors or have any suggestions to share – please keep them to yourself!